Showing posts with label diy. Show all posts

Friday, September 16, 2011

TuTu Cute


I FINALLY got to do it! A tutu mobile!

My BFF and I had planned a craft day. She loved the mobile and 'L' I had made for baby Logan's rooms, and her hubby had requested all of the rest of the letters (the 'ogan' part) to hang above the closet in the nursery. Since the L I made was 12"x12", what I had on hand wouldn't quite work, so we planned to shop it up at Michael's and make a whole craft day of it. The plan was the figure out letters for above the closet, make a fabric book shelf/pocket type thing (BFF recently joined Pintrest and this was her first planned Pintrest project), and since her neighbor had a baby girl about a month ago, I thought this would be the perfect time to try out my TuTu mobile!

We ended up shopping for FOUR HOURS for our projects. JoAnn Fabric and Lowes were our first stops to buy things for the book pocket (a project we never even got to, so that may possibly be another post). Then we went to Michaels where the majority of our time was spent. We had NO IDEA what we were going to get for the letters or the tutu mobile. After fumbling around for different letter options, we ended up with wooden letters about 3"-4" tall, and thin thin canvases about 6"x4". The letters were white so we figured we would paint the canvases then hot glue the letters on top. We grabbed more craft paint in case what I had left from the airplane mobile wasn't enough, and that project was settled.

We spent much more time trying to figure out what to hand off of the tutu mobile. I knew the basics and grabbed a wire wreath form and two spools of pink and white tulle from the wedding section (I knew I needed three spools of ribbon to cover two wire rows on the airplane mobile, so I compared the length of the ribbon to the tulle, and since the tulle was much longer I figured two of those would take care of it). After wandering through the baby and wedding aisles, fake flowers, jewlery, and scrapbooking, we decided on hanging a combination of paper flowers (green because the nursery is pink and lime green) and crystal beads (pink and clear).

The process for the tutu mobile was pretty much the same as the airplane mobile (seen here). I first painted the green wreath form white, then I unrolled each spool of tulle and kept cutting it in half until I had pieces that looked like a good size. Originally I was going to alternate pink and white, but when I pulled the first few pieces up, it looked like I had cut the white ones shorter than the pink, so I decided to do the outside row in white, and the second row in pink (turns out it was just the pieces I picked up, so I could have alternated, but it looks this way too). I'm not sure if I explaned how I did the ribbon in on the airplane mobile, but basically I folded the ribbon/tulle in half, stuck the loop part inside the row I was working on, and pulled the ends through the loop, so the wire was in the middle. I had to hot glue the ribbon in place, but the tulle held on to itself quite well.


As for the hanging part, it was all trial and error. Do something, show BFF, adjust. Every flower had a bead under it to keep it on the line. Some had one or two above/below it, and there were also some beads that were on their own on the line. I have to say, it took me a long time to complete three rows (including hot gluing a dot above and below each bead to be double sure they wouldn't fall off and end up in baby's mouth... eek that would NOT be good). So I passed the job along to the BFF and she found a MUCH better, and faster, way to hold the beads in place by threading the string through the bead, then looping back around and threading it through again (then we'd still hot glue dot it just to be sure!)- I had previously been tying multiple knots on top of each other, till it was big enough to hold the bead. She also came up with more creative ways of alternating bead and flowers. So six strings later and together we eyeballed where they would hang, and how long they would hang (though we did some of this as we were putting them together, so we didn't end up with the all the flowers and beads at the same lengths).

Here's a closer look at the flowers and beads, and the variance in how each was hung:


\


To finish off, we hung the strings at the top, and I pulled every other pink piece of tulle from the second row, through the white on the first row to give more color variance, and voila:


I even took a picture to see how it would look to the baby... very pretty!


I was not there when baby's mom came and saw it, but I heard she loved it, and was so surprised that we had made it for her. I have seen her since though, and she is still looking for a place to hang it, but cannot wait to get it up in the nursery.

As for a price breakdown, I unfortunatly forgot to keep the reciept, but my only purchases for this mobile was the two spools of tulle, the wreath form, a box of paper flowers, and two colors of beads (two strings on each). I believe my total came out to be around $25, and the only reason for the higher expense than the airplanes, is that the flowers were $7 for the box, and the beads were around $6 for both. Much more expensive then popsicle sticks and clothespins, though I ddin't have to buy any paint for this one. I do have a string of each color beads left, and about 1/4 of the box of flowers, so I could use those for another mobile (and during this I inadvertantly discovered how to make a palm tree out of the beads and green flowers, and one of my other mommy-to-be friends has palm trees in her nursery bedding, hmm...)

Sunday, August 28, 2011

Crafty Gift-ness

*You can see this is a post from August, so I'm kind of cheating on this season's Pintrest Challenge, but it was originally made during the week of the first Pintrest Challenge and I didn't quite get it up in time. So I'm cheating a bit- hey we moved into our house this weekend so I had little crafting time this weekend! Also- be sure to check out the hilariously awesome Challege Host's we-followed-the-rules-and-actually-did-our-project-this-weekend projects: Sherry, Katie, Katie, and Ana

So two of my best friends are having babies- both due in October and both boys! It's been a crazy time recently for me and babies. I swear it seems like EVERYONE and their mom are pregnant (okay maybe not their mom's, but you get the picture). A couple weeks ago I went to three baby showers within 8 days. Baby's R Us has about half of my bank account now! Of course I am having such a great time looking at all the baby stuff and getting things for these new little men, I (sort of) don't mind spending all my money on them.

Since I've been addicted to Pintrest recently, I have been pinning crafty baby stuff like crazy and can't wait to make all sorts of cute stuff for these upcoming babies in my life. I did get to make my first gift for little Logan Patrick Schauer (and of course his mommy!) a few weeks ago. Mommy (aka my bff..&e&e&e&e&e) and Daddy have decided to go with a airplane (and helicopter) theme for little Logan's room, so of course when I saw this picture:


found on Pintrest but originally from here

And tons of pictures like this:


Also found on Pintrest but originally from here


And of course this blog post/tutorial from the amazing couple over at Young House Love on how they made the cool mobile for their little girl's nursery, seen here:


I knew I had to make something for that baby! Since the baby shower was coming up, I checked on the registry for the bedding and mentally noted colors. I briefly viewed the tutorial for the clothespin airplane, figured I could wing the ribbon mobile part, and headed to Michaels.

I wandered around the store looking for anything, and everything, that would make this work. I ended up with: medium sized clothes pins, smaller and larger popsicle sticks, tan, blue, and green paint, clear string, three spools of skinny ribbon, and a wire wreath form. And since I didn't have any of the crafting essentials, I had to purchase those too: foamy paint brushes, and glue gun, and glue sticks (and a note to self, and anyone as ditsy as I am, be sure glue sticks are the right size for the glue gun- cutting sticks in quarters to fit into your glue gun makes a HUGE MELTY MESS).

I started with this pile of stuff :


didn't do much figuring, and just went at it.

What's not in this picture is the wreath form that I bought the hang everything from (don't worry it's coming!). I went with the wreath form as opposed to an embroidery hoop (which is what most of the ribbon mobiles I've seen are made on) because I wanted to be able to hang the airplanes in different spots on the mobile, and not just around the outside. The one I bought had three rows of wire (heavy, thick, sturdy wire) at varying heights, so the planes could be hung on the outside and more towards the middle. I'm sure there's other things you could use that would let you hang more towards the middle. Originally I was hoping to find something similar to the splatter screens that people use for cooking, or to be able to make something like that with a thick wire hoop and thin bendy wire. but the wreath form was sitting right at the end of the aisle, would do the job, and would require less work from me.

Step one was the paint the pieces. I decided that I wanted the airplanes bodies and wings to be different colors, like in the photo above, but wanted the larger and smaller wings to be the same color. You can see I used a box from recycling to paint both sides of the clothes pins at once, and would just flip the popsicle sticks once one side was dry (luckily the paint dried pretty fast). I didn't know how many airplanes I would need, but I figured the more, the better, and then I'd have more color options when hanging them. I painted about 12-16 clothespins, then chose how many popsicle sticks of each color to paint based on how many of each color clothespins I had, so I wouldn't end up with any planes that were all one color (don't ask me why I didn't just make the same number of each color...)


You can can actually see the wreath form in that picture (YAY), and you can also see that it started our dark green, which would probably make sense for a wreath, but in this case, needed to be painted. I thought tan would be the least intrusive, so bye bye green.


Then I assembled the airplanes with the hot glue. This process would have gone much faster if I has purchased the right size glue sticks (and/or wasn't too lazy to drive back to the store to get the right size). I guess the outside coating on glue sticks keeps it from melting until the stick is INSIDE the hot tunnel of the glue gun. My large, cut-into-quarters sized sticks kept melting in the open space and oozing out the side. I had to keep pulling the stick out and cleaning the melted mess (now THAT is what I should have taken a picture of). But finally I finished and had these lovely guys:


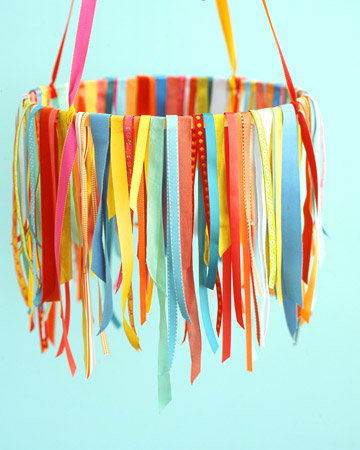
The next step was the get the ribbon part together. I figured I'd cut all three spools into pieces, and would figure something out if there was extra pieces at the end. I just pulled all the ribbon off the spool and cut it in half, then kept going till it was a length I liked. Originally I left the ribbon strips long, like in the Pintrest photo, but it only covered the outside ring of the wreath form. Plus I figured I would have to hang the airplanes lower than the ribbon, and I thought it might end up too long. So I cut each strip in half and it ended up covering the outside and middle rows of the form (which worked out better because the middle row was higher than the other two anyway). I'm sure there are plenty of ways to attach the ribbon based on the look you want and how much length of each ribbon strip you want hanging. I went with the fold ribbon in half and stick ends through the loop method, thinking that it would stay on it's own and I wouldn't have to fool with the mismatched glue gun/glue stick thing again. By the next morning all the ribbon was falling off, so I did have to stick a dot of hot glue on the ribbon to make it stay.

After gluing the ribbon I hung my ribbon mobile from a light in the kitchen and fooled with hanging the airplanes. When it came to that I really just eyeballed what looked good. I fiddled with how to tie the airplanes so they hung level but eventually found a way to do it, but don't ask me how- I could not replicate it now if I tried. Then I would hold the string up to the mobile and check out different lengths until it looked good. I did the same with each airplane, then stepped back and looked at it. I did add a few more after I thought I was finished. I'm sure you could go more or less, whatever looks good to you. I did end up with tons of extra airplanes, but I think if I had hung them all, it would have looked too cluttered. Now baby Logan will get airplanes on all his presents for years!

So a million words later, here's what baby Logan will have hanging in his room (I think over the changing table, but Mommy's changed her mind once already!)


Mommy and daddy loved it, and I've been plotting how to make this for other themes... or for girls. I would love to make one with tool at the top instead of ribbon... like a tutu! And maybe make some small fabric pom poms to hang. Oh someone please have a girl soon!!

So Total Cost breakdown is as follows:
Bag of wrong size glue sticks: $9.99
Wire wreath form: $2.49
Tiny glue gun: $2.49
3 Spools of Ribbon @$2.99ea: $8.97
Clear string: $3.49
Bag of mini popsicle sticks: $2.99
Bag of large popsicle sticks: $2.99
Bag of clothes pins: $2.49
3 20oz of craft paint @$0.33ea: $0.99
3 paint brushes @0.39ea: $1.17
___________________________
TOTAL $38.06

but if you assume most crafty people own glue guns and the correct size glue for them, and at least the paint brushes that will take your total to $24.41

And right now I have 3/4 of each tube of paint left, A TON of string, 3/4 of the small popsicle sticks (I started with 150 though), 1/4 of the large popsicle sticks (started with 50), and 1/4 of the clothespins left (started with 24). And if I hadn't painted too many airplanes in the beginning I would probably have half the clothespins and half the large popsicle sticks left. So I probably could have made two mobiles out of the stuff and would have only needed to buy more ribbon for the second one. Adding that in, that brings the total to $16.69 a piece. I don't think you could buy a mobile in the store for that. And it really only took about 2 hours total to do, plus you could totally customize it for whatever theme you needed.